VPSSIM supports the AlmaLinux, CentOS Stream, RockyLinux, and Oracle Linux operating systems, versions 8 and 9, on servers using Intel/AMD/ARM CPUs, allowing you to choose the operating system that best suits your needs.
When setting up a server with VPSSIM, you can choose the following versions:
PHP: The minimum version is PHP 7.2, depending on the operating system version you select. For example, with RHEL 9 (like AlmaLinux 9), PHP is available from version 7.4. With RHEL 8 (like AlmaLinux 8), PHP starts from version 7.2. After completing the server installation, if you want to change to another PHP version, use the “Change PHP Version” feature in VPSSIM.
Preparing the Server:
- A VPS (Server) running AlmaLinux, CentOS, RockyLinux, or Oracle Linux, version 8 or 9. While VPSSIM still supports CentOS Stream, I do not recommend using it for general users.
- PUTTY software for connecting to your VPS via SSH if you’re using Windows. On Linux/Mac, you can use the built-in Terminal. Simply log in to your server via SSH and copy the command from VPSSIM.Net to start the installation.
- VPSSIM includes an automatic swap creation feature. Therefore, after installing VPSSIM, you can quickly and easily create a swap without needing to set it up beforehand.
Set Up VPSSIM by Using Command:
curl https://get.vpssim.net -o install && sh install
then choose the language:
=========================================================================
Powered by VPSSIM.COM & VPSSIM.NET
————————————————————————-
Vietnamese: VPSSIM.COM | English: VPSSIM.NET
=========================================================================
Select Language / Chon Ngon Ngu:
————————————————————————-
1. English
2. Vietnamese (Tieng Viet)
=========================================================================
Type in your choice / Nhap lua chon cua ban [1-2]: 1
You can select English by typing 1 and pressing Enter. Next, VPSSIM will ask you to confirm disabling SELinux. Simply press Enter and VPSSIM will handle this process automatically.
VPSSIM will disable SELinux on the server before installation.
————————————————————————-
After disabling SELinux, the server will reboot.
————————————————————————-
Once the reboot is complete, please log in again using the root account.
————————————————————————-
Then run the installation command again to continue installing VPSSIM.
=========================================================================
Press [[ Enter ]] to begin disabling SELinux.
After disabling SELinux, whether the VPS needs to reboot depends on the system.
If a reboot is not required, you can skip the step of rerunning the installation command.
If your VPS does require a reboot, log in again and run the installation command as before:
curl https://get.vpssim.com -o install && sh install
After that, you will need to enter your email address and select the PHP version.
=========================================================================
You can choose to install one of the following PHP versions:
————————————————————————-
PHP: 7.4, 8.0, 8.1, 8.2, 8.3, 8.4
=========================================================================
Server Information:
————————————————————————-
Server Type: kvm
CPU Type: Intel Xeon Processor (Skylake, IBRS, no TSX)
CPU Core: 2
CPU Speed: 2294.608 MHz
Memory: 3562 MB
IP: 95.216.187.190
=========================================================================
Currently, a valid email address is required to register for Free SSL.
————————————————————————-
You only need to update your email address once, no password required.
=========================================================================
Enter your email address: [email protected]
=========================================================================
On this server, VPSSIM supports the following PHP versions:
=========================================================================
1) PHP 7.4
2) PHP 8.0
3) PHP 8.1
4) PHP 8.2
5) PHP 8.3
6) PHP 8.4
=========================================================================
Please enter the corresponding number for the PHP version you want to install.
————————————————————————-
(Example: To install PHP 8.0, enter 2.)
————————————————————————-
Enter your choice: 6
=========================================================================
Are you sure you want to install PHP 8.4? (y/n): y
The installation process will now begin:
————————————————————————-
Preparing to set up the server …
————————————————————————-
Please wait …
Once the installation is complete, VPSSIM will display the basic information such as the management link, username, and password for access:
=========================================================================
Server installation has been completed.
=========================================================================
Command to launch VPSSIM: vpssim
————————————————————————-
Server Management Link: http://95.216.187.190:34618
————————————————————————-
Login information for the Management Link:
————————————————————————-
Username: vpssim22  | Password: ba6caed72768d3cbb2130e94f5ce89ac
=========================================================================
Server will reboot in: 15 14 13 12 11 10 9 8 7 6 5 4 3 2 1
Once the VPS has restarted, you can run VPSSIM using the command: vpssim or v
=========================================================================
            VPSSIM (6.3.1) – Manage VPS/Server By VPSSIM.NET
=========================================================================
Version: PRO |                Main Menu             |Activated: 13/06/25
=========================================================================
Websites: 12 | Databases: 2 | Home Free: 36 GB | Inodes Used: 2%
=========================================================================
1) Add Website & Code               20) Backup Data To VPS Backup
2) Fix Permission & Chown Error     21) Sync Backup To Google Drive
3) Remove Web, Domain & Subsite     22) Transfer Data To New Server
4) Backup & Restore Website         23) Resilio Sync Manage
5) Add, Delete & Check Database     24) Set Up Free SSL (Let’s Encrypt)
6) Backup & Restore Database        25) Set Up Paid SSL & CloudFlare SSL
7) WordPress/Flarum/YourLS Tools    26) Tools – Addons
8) WordPress Multisite Manage       27) Change PHP Version
9) Manage phpMyAdmin/File Manager   28) Config Nginx: GeoIP,Error Pages..
10) Zend OPcache Manage             29) Set Up CloudFlare Dynamic DNS
11) Memcache / Redis Cache Manage   30) Set Up & Config V2Ray (VPN)
12) FTP Account Manage              31) Setting Server Timezone
13) Swap & Log Manage               32) Management & Status Info
14) Cronjob Manage                  33) VPSSIM Shortcut / Update System
15) Manage PHP Settings             34) Clear Caches / Autorun VPSSIM
16) Secure Server & Websites        35) Auto Check Login/Nginx/MySQL/PHP
17) CSF Firewall Manage             36) Change Language To VietNamese
18) IPtables Firewall Manage        37) Update To The Lastest Version
19) Check & Config Anti-DOS/DDOS… 38) Upgrade To VPSSIM PRO
=========================================================================
Type in your choice [0 -Exit]:
Main Menu => Management Info & Status Info => Server Management Information
=========================================================================
        VPSSIM (6.2.4) – Manage VPS/Server By HTTP://VPSSIM.NET
=========================================================================
                        Server Management Information
=========================================================================
Time Zone || Server: GMT+07 – Mon May 5 03:10 | PHP: Asia/Bangkok
=========================================================================
Management Link: http://95.216.187.190:34618 | Protection: ON
=========================================================================
VTS Domain: Not Installed => Install via [Add Website & Code]
=========================================================================
MySQL root account:
————————————————————————-
User: root | Password: ba6caed72768d3cbb2130e94f5ce89ac
=========================================================================
Access paths: phpMyAdmin, File Manager, Status, backup files …
————————————————————————-
http://95.216.187.190:34618
————————————————————————-
Access credentials (Default password):
User: vpssim22 | Password: ba6caed72768d3cbb2130e94f5ce89ac
To change user & password:
VPSSIM menu ==> Server & Website Security ==> Change Default Password
=========================================================================
File Manager:
————————————————————————-
Login credentials:
User: vpssim | Password: fa33b9c499d79fab14fa899cee296f84
To change user & password:
VPSSIM menu > Manage phpMyAdmin, File Manager > Change File Manager Password
=========================================================================
Resilio Sync Management:
————————————————————————-
Resilio Sync is not installed.
To install Resilio Sync:
VPSSIM menu > Manage Resilio Sync > Install Resilio Sync
=========================================================================
SSH Access Port: Current: 22
————————————————————————-
To change SSH port for better security:
VPSSIM menu > Server & Website Security > Change SSH Port
=========================================================================
VPS has not been configured for DDoS protection and load optimization:
————————————————————————-
You can greatly improve VPS performance by:
DDoS Protection & Web Security => Enable Request Rate Limiting
Guide: http://help.vpssim.com/2891
=========================================================================
=========================================================================
Press [Enter] to return to the VPSSIM menu …
Access the management link at: http://vps_ip:34618, and use the username and password provided in the Server Management Information section to log in.
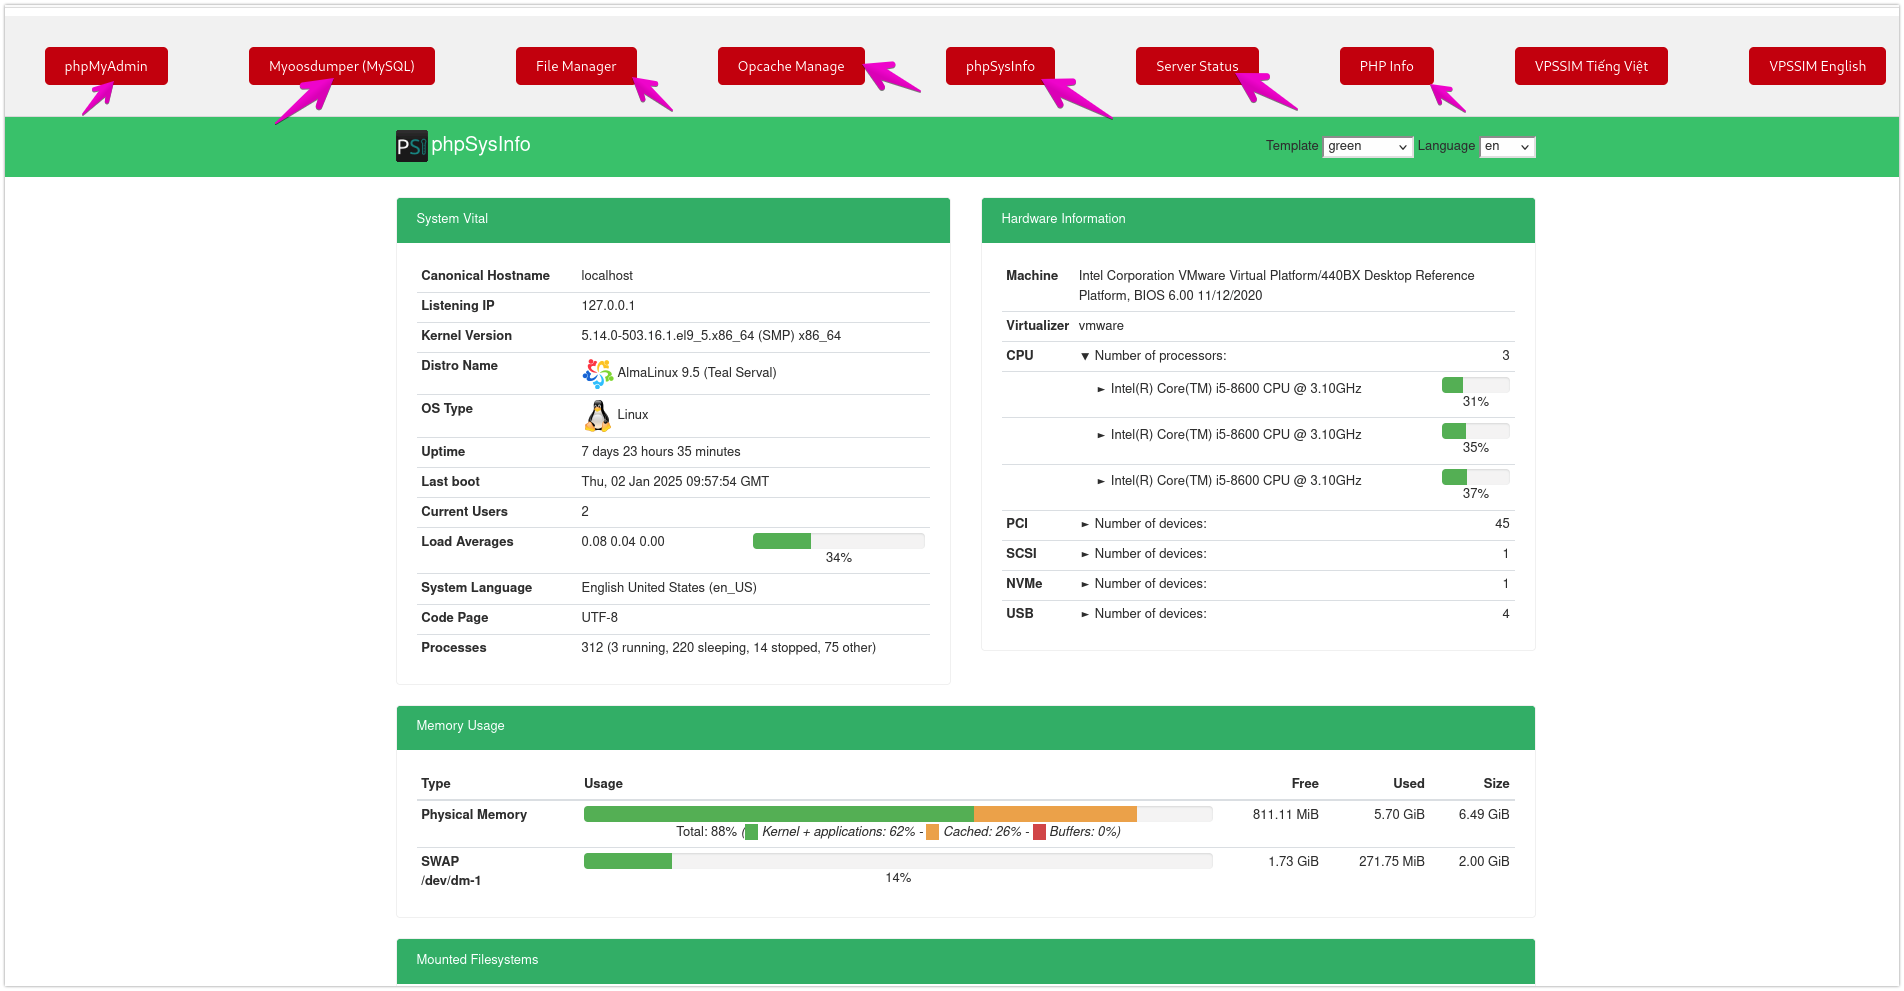
At the management link, you can access:
• phpMyAdmin
• My00sdumper
• File Manager (using the login details from the Server Management Information)
• Opcache Manage (used to clear PHP cache whenever you edit a PHP file)
• phpSysinfo (the default page displayed is this)
• Server Status (similar to phpSysinfo)
• PHP Info
That’s it! I’ve completed the guide on installing VPSSIM for VPS/Server. Thank you!